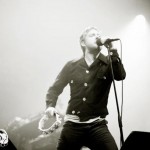
 I never thought about this as being interesting for anyone else but I finally gave in to the “pressure” and decided to dedicate a post to the topic. I do not think that there is “the one” workflow that works for everyone out there. I actually think that every photographer eventually finds his/her own way after a while, but some pointers might help getting there faster. Even if I shoot other things (can be seen here) than concerts, my workflow doesn’t really change that much. At least not until the post processing, but here I go:
A few tips before starting ….
When I put a full card back into the card box I make sure to insert it upside down into the card holder. There are two reasons to that, the first one is that I won’t use the same card again by mistake (it sounds stupid, … but never say never. Trust me on this one) and the second one is that it might save me some time in looking for which card was used or not when I am back at my workstation. One could argue to delete/format the cards straight after the import. True, but at the time I import my pics, the camera bag still sits in the trunk of my car.
The import
 The first thing that happens (I know, sounds logical but stick with me on this one) is the import onto my local hard drive. I do that via Lightroom. I change the filenames so that they represent the subject I photographed, the date and a sequence number. I take great care of tagging all the pictures for later use in LR , flickr or even in WordPress for search tags. I use the “backup” function within Lightroom that actually saves a second copy of my RAW files to my NAS residing in my local network. I should add here that I also have a copy going to an external drive attached directly to my Mac. I am in the process of testing some online backup solutions but haven’t found anything suitable yet. I’ll make sure to blog about it as soon as I have found anything interesting. It is very important to me to backup all my files before I do anything with them, in fact I won’t touch any of the files until I know I’ve got a backup on at least two different locations. For those who wonder if they read correctly, …. yes I shoot in RAW and only in RAW. The control I have over the file is way more important to me than the space on the card.
The selection
I start with a very rough selection in which I eliminate every picture that has a technical default like being out of focus or too soft, badly exposed and so on. And by that I mean delete from the disk, not only from my selection. I still have a copy on my backups just in case but I don’t see the point of wasting space on my local drive with pictures I won’t use at all. Now I select the ones that are interesting enough to keep looking at. To do that I use the “flag” function in lightroom. After the first pass I activate the filter and set it to flagged only. Now I go through my selection again and unflag all those in which I don’t like the composition. In concert photography you don’t always have time to compose your pictures, when the lead guitarist starts posing 20 cm in front of your camera the first thing you do is to hit that shutter release and hope that the picture is sharp and in focus. I resume this until it leaves me with only the pictures I like the best from the set. That usually leaves me with enough pictures to deliver to whatever media hired me. I then put them all together into a collection.
Adjustments
This is where my workflow changes depending on what I’ve photographed. For non concert pictures I would add a Photoshop or Plug-In software part to this step, but since this is my concert photography blog I will focus on concerts only. I normally start by adjusting the white balance, I do that because I shoot on “Auto White Balance” only. Since the lights are somewhat “changing” during concerts the white balance is all over the place. I have not found a way yet to nail it at every shot, so I set it to Auto and ajust accordingly in Lightroom during the post processing phase. I sometimes add a little of “Fill” in Lightroom and boost the contrast a bit. The next step here would be noise reduction. I actually don’t use the noise reduction very often any more because I like a certain amount of noise in my concert photographs and to be honest since I use the Canon 1DMkIV noise is not really a problem. Lately I give all my concert pics a certain “tint” that I adapt to the band’s style. Purists might argue that it changes the feel of the concert but I just like to give a little touch of something.
The export
 Due to the variety in social networking I have different exports to do for my concert pictures. The first one is for the Media I shoot for. I use a preset that I’ve created for that as it rarely changes.
Then I select two or three pictures that I will include in the Blog post. The rest goes to flickr into separate sets. I also use the flickr gallery to include in my post. All of my pictures that go onto social networking sites will be watermarked. I know it’s a topic on it’s own and I know that most people out there can remove them in about 2 minutes, but it might put some people off. On that note I’d like to write here that I’ve always given the permission to people to use my pictures on their websites or blogs as long as it’s not commercial and as long as I am credited as the photographer. And I know for a fact that a lot of my photographer colleagues do the same. So peopel, ….. there’s really no point in stealing pictures …….. just ask.
Well that’s about it, …. while it looks like a lot of work when written down it all takes approximatively 30 to 40 minutes per concert.


Leave a Reply